Siding Trim Repair A Comprehensive Guide
Siding trim repair is a crucial aspect of maintaining the exterior of your home. Properly maintained siding trim prevents costly damage, from water intrusion to structural issues. This guide explores various trim materials like wood, vinyl, and aluminum, highlighting their typical lifespans and maintenance needs. We’ll delve into identifying damage, from cracks to rot, and explain effective repair methods, including caulking, patching, and replacement. Furthermore, we’ll cover preventative measures to ensure long-term protection for your siding.
Introduction to Siding Trim Repair
Siding trim repair encompasses the maintenance and restoration of the decorative and protective elements surrounding a building’s siding. This includes various materials such as wood, vinyl, and aluminum, each with unique characteristics affecting the repair process and lifespan. Proper maintenance of this trim is crucial for the overall health and aesthetic appeal of the home.
Proper siding trim repair is vital to prevent costly damage and structural issues. Neglecting this essential component can lead to water infiltration, rotting, and compromised structural integrity. Regular inspections and prompt repairs minimize the risk of significant problems developing over time.
Common Reasons for Siding Trim Repair
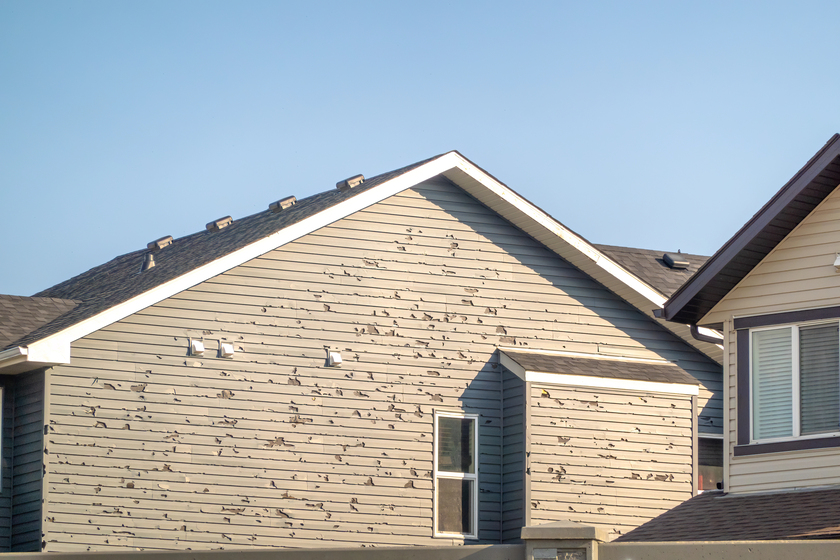
Several factors can lead to the need for siding trim repair. Weather damage, including wind, rain, and extreme temperatures, is a significant contributor to trim deterioration. Exposure to UV radiation can fade or damage certain materials, while moisture can cause rot or warping in wood trim. Impact damage from hail, debris, or even construction accidents can necessitate repair. Finally, pest infestations, such as carpenter ants or termites, can cause substantial damage to wood trim and demand immediate attention.
Potential Consequences of Neglecting Siding Trim Repair
Failure to address damaged siding trim can result in a cascade of problems. Water damage, caused by improperly sealed or broken trim, can lead to the deterioration of the underlying siding and the potential for mold and mildew growth. This can compromise the structural integrity of the home, causing costly repairs or even compromising safety. Aesthetically, neglected trim can create an unappealing appearance, detracting from the property’s value. Furthermore, extensive damage from unchecked issues can lead to significant financial burdens.
Siding Trim Materials and Lifespan
The longevity of siding trim depends on the material used. Different materials exhibit varying resistance to the elements and require different levels of maintenance.
| Material | Typical Lifespan | Maintenance Needs |
|---|---|---|
| Wood | 10-20 years (depending on species and treatment) | Regular sealing and painting to prevent rot and decay. Inspections for pest damage are critical. |
| Vinyl | 20-30 years (depending on quality and exposure) | Periodic cleaning to remove dirt and debris. Check for damage from impact or weather. |
| Aluminum | 30-50 years (depending on quality and finish) | Regular cleaning to prevent corrosion. Check for damage from impact or dents. |
Identifying Damage
Properly identifying siding trim damage is crucial for effective repair. Ignoring subtle signs can lead to worsening issues and more costly repairs down the line. A thorough inspection will pinpoint the source and extent of the problem, enabling you to choose the right repair strategy and prevent further damage.
Visual inspection is the first step in identifying damaged siding trim. Careful observation can reveal a range of issues, from minor cracks to significant rot. Understanding the signs and utilizing appropriate assessment methods is vital for successful repair.
Common Signs of Damaged Siding Trim
Identifying damage often starts with recognizing common signs. These can include visible cracks, rotting wood, gaps or separations between sections, and loose or detached pieces. Each of these indicators suggests a potential problem that requires attention.
- Cracks: Cracks in the trim can be caused by various factors, including weathering, temperature fluctuations, or even impact. The severity of the cracks will influence the repair approach. Small cracks can often be filled and sealed, while extensive cracking may require replacing the affected section.
- Rot: Rotting trim, usually noticeable by soft spots, discoloration, or a spongy texture, indicates the presence of moisture and fungal growth. Left untreated, rot can quickly spread throughout the trim, leading to significant structural issues.
- Gaps and Separations: Gaps or separations between sections of trim often point to loose fasteners or inadequate installation. These issues can allow moisture to penetrate the trim, further compromising its integrity.
- Loose Sections: Loose sections of trim can be easily identified by gently trying to move them. If a section shifts or moves, it’s a clear indication of a structural issue that requires immediate attention to prevent further damage.
Visual Inspection Techniques
A thorough visual inspection is essential for accurate damage assessment. Carefully examine the trim for any of the previously mentioned signs. Use a ladder or appropriate tools to reach higher sections of the house. Proper safety measures are crucial for your well-being during this process.
- Reaching Higher Sections: Employing a sturdy ladder and appropriate safety gear is critical when inspecting higher sections of the house. Take care to avoid any potential falls or injuries. Consider using binoculars or a telescopic pole with a camera attachment for better visibility of higher areas.
- Using Tools: Utilize tools like a screwdriver, flashlight, and measuring tape to inspect trim sections. A flashlight can reveal hidden damage, while a measuring tape is useful for assessing the extent of cracks or gaps.
Assessing the Extent of Damage
An accurate assessment of the extent of damage is paramount for successful repair. This involves measuring the size and depth of cracks, evaluating the extent of rot, and determining the degree of looseness.
- Measuring Cracks: Measure the length and depth of any cracks to determine the repair method. Note if the cracks are extending or branching out. Detailed measurements provide crucial information for repair planning.
- Checking for Rot: Assess the area of rot by visually inspecting the affected wood. Use a probe to check for softness and the extent of the decayed area. If the rot is extensive, replacing the trim section may be necessary.
Damage Type and Repair Methods
This table summarizes common siding trim damage types and their corresponding repair methods.
| Damage Type | Description | Repair Method |
|---|---|---|
| Cracked Trim | Presence of cracks, varying in size and depth. | Repair with appropriate filler and sealant, or replace if extensive. |
| Rotted Trim | Soft, spongy, or discolored wood due to moisture damage. | Remove the rotted section and replace it with new, rot-resistant material. |
| Loose Trim | Sections that are not securely attached to the house. | Tighten or replace loose fasteners and secure the trim section. |
Repair Methods and Procedures
Addressing damaged siding trim requires careful selection of repair methods and adherence to proper procedures. Incorrect repairs can lead to further deterioration and potentially compromise the structural integrity of the siding. This section details common repair techniques, material selection, and safety precautions to ensure effective and lasting solutions.
Effective siding trim repair hinges on identifying the cause of the damage and selecting the most appropriate repair method. This approach minimizes the risk of reoccurring issues and maintains the aesthetic appeal of the home’s exterior.
Caulking
Caulking is a common and effective method for sealing gaps and cracks in siding trim. It’s particularly useful for preventing moisture intrusion and maintaining the integrity of the trim’s appearance.
- Procedure: Clean the affected area thoroughly, removing any loose debris or dirt. Apply a bead of caulk, ensuring a consistent and even application. Smooth the caulk with a damp cloth or a caulk tool to achieve a clean finish. Allow the caulk to cure according to the manufacturer’s instructions.
- Material Selection: Select a caulk type appropriate for the specific application and environment. For exterior use, a high-quality, exterior-grade silicone or acrylic caulk is recommended. Consider the color match to the trim for a seamless appearance.
- Safety Precautions: Always wear safety glasses to protect your eyes from splashes or debris. Ensure proper ventilation in the work area to avoid inhaling fumes. Follow the manufacturer’s instructions regarding drying time and handling.
Patching
Patching is suitable for repairing minor damage or holes in the trim. This method is often employed when the damage is localized and doesn’t necessitate complete replacement.
- Procedure: Clean the damaged area thoroughly. Prepare a patch using a suitable material, such as wood filler or a patching compound. Apply the patch evenly and smooth it to match the surrounding trim. Allow the patch to dry completely according to the manufacturer’s instructions. Sand the patch smooth after drying to blend it with the existing trim.
- Material Selection: Choose a wood filler or patching compound compatible with the trim material. For wood trim, a wood-based filler is ideal. Ensure the color matches the existing trim for a seamless repair.
- Safety Precautions: Wear a dust mask to prevent inhalation of wood dust or filler particles. Use appropriate safety glasses to protect your eyes. Follow the manufacturer’s instructions carefully to ensure proper drying time and handling.
Replacement
Complete replacement is necessary for significant damage or deterioration that cannot be effectively repaired with caulking or patching.
- Procedure: Carefully remove the damaged trim section, taking note of the existing fasteners. Measure and cut a replacement piece to the exact dimensions. Install the replacement piece using the original fasteners or appropriate screws. Caulk any gaps or seams to ensure a watertight seal.
- Material Selection: Choose a replacement trim piece that matches the existing trim in material, color, and style. Select appropriate fasteners or screws that are compatible with both the replacement piece and the underlying structure.
- Safety Precautions: Use appropriate safety glasses to protect your eyes from flying debris. Be cautious when handling sharp tools and fasteners. If working at heights, use proper fall protection equipment.
Tools for Siding Trim Repair
| Repair Method | Tools Needed | Procedure |
|---|---|---|
| Caulking | Caulk gun, caulk, utility knife, damp cloth, safety glasses | Clean the area, apply caulk, and smooth with cloth |
| Patching | Utility knife, sandpaper, wood filler or patching compound, putty knife, safety glasses, dust mask | Clean the area, apply the patch, smooth and sand |
| Replacement | Measuring tape, saw, screwdriver, hammer, safety glasses, ladder (if applicable), replacement trim piece | Measure, cut, remove old trim, install new trim, and secure with fasteners |
Prevention and Maintenance

Source: windows.net
Proper preventative measures are crucial for maintaining the longevity and aesthetic appeal of siding trim. Regular inspections and maintenance can significantly reduce the need for costly repairs and extend the lifespan of your trim. By proactively addressing minor issues, you can avoid more extensive and expensive repairs down the road.
A proactive approach to siding trim care involves understanding the various factors that contribute to damage and taking steps to mitigate these risks. Regular maintenance, coupled with a vigilant eye for potential problems, ensures your siding trim remains attractive and functional for years to come.
Preventing Siding Trim Damage
Regular inspections are essential for identifying potential problems early. Visual inspections should be conducted at least twice a year, ideally in spring and fall, to catch any signs of damage before they worsen. Pay close attention to areas that are exposed to moisture, such as corners, joints, and areas around windows and doors. Addressing these concerns early prevents water damage and rot. Proper ventilation is another crucial preventative measure. Ensure adequate air circulation around the siding trim to prevent moisture buildup. This is particularly important in areas with high humidity or frequent rainfall. Avoid using excessive amounts of sealant, which can trap moisture and create further issues. Over-application of sealant can be just as detrimental as inadequate application.
Regular Maintenance Procedures
Regular cleaning is vital for maintaining the condition of siding trim. A simple cleaning with mild soap and water, followed by rinsing, can remove dirt, debris, and accumulated grime. This helps maintain the trim’s aesthetic appeal and prevents the buildup of substances that could lead to deterioration. Sealing is another crucial maintenance task. Apply a high-quality sealant to areas susceptible to moisture damage, such as joints, corners, and seams. This creates a protective barrier against water penetration, preserving the integrity of the trim. Regular sealing, typically every few years, should be part of your preventative maintenance plan.
Preventative Measures for Extended Lifespan
Implementing preventative measures is key to extending the lifespan of your siding trim. By addressing potential issues proactively, you can avoid costly repairs and maintain the trim’s structural integrity. Consider using high-quality materials, as they are more resistant to weathering and environmental factors. Furthermore, proper installation techniques, including using the correct fasteners and ensuring proper alignment, are paramount to long-term performance. Examples include installing trim with proper spacing to allow for expansion and contraction, and using fasteners that are appropriate for the specific climate and material.
Addressing Minor Issues
Promptly addressing minor issues is crucial to avoid major problems. A small crack or loose fastener, if left unattended, can lead to significant damage. By immediately addressing these small issues, you can prevent them from escalating into larger, more costly repairs. A prompt response to minor issues can save you time, money, and frustration in the long run.
Regular Siding Trim Maintenance Checklist
| Task | Frequency | Description |
|---|---|---|
| Visual Inspection | Twice annually (spring & fall) | Inspecting for cracks, damage, and signs of moisture. |
| Cleaning | As needed (e.g., after storms) | Remove dirt and debris with mild soap and water. |
| Sealing | Every 3-5 years, or as needed | Apply sealant to vulnerable areas to prevent water damage. |
| Repair Loose Fasteners | Immediately | Tighten or replace any loose fasteners to prevent further damage. |
| Address Minor Damage | Immediately | Fix cracks, gaps, or other minor issues to prevent them from worsening. |
Case Studies and Examples
Siding trim repairs can vary significantly depending on the material, the extent of damage, and the desired outcome. This section presents real-world scenarios to illustrate common repair situations, highlighting the process from initial assessment to final restoration. Understanding these examples will empower you to approach your trim repair projects with greater confidence.
This detailed breakdown of case studies offers practical insights into common siding trim repair challenges. Each example articulates the damage, the chosen repair method, and the resulting improvement. This structured approach facilitates understanding and provides a clear roadmap for addressing similar issues on your property.
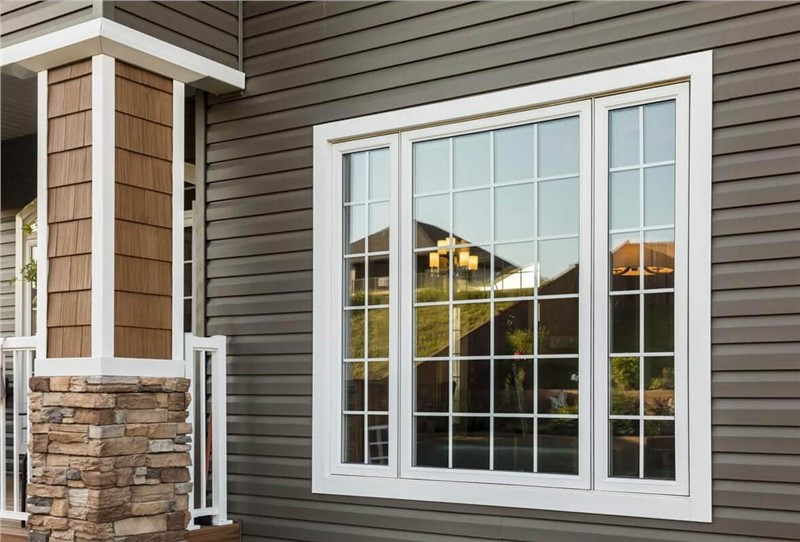
Damaged Vinyl Corner
Vinyl siding trim, while durable, can sustain damage from impacts or weathering. A chipped or cracked corner can compromise the overall aesthetic and structural integrity of the siding. The repair method depends on the severity of the damage.
| Scenario | Damage Type | Repair Method | Outcome |
|---|---|---|---|
| Chipped Vinyl Corner | A small, superficial chip on a vinyl corner trim piece. | Using a vinyl patching kit, the damaged section was carefully filled with a matching vinyl compound. The repair compound was then sanded smooth and painted to match the surrounding siding. | The repaired area blended seamlessly with the existing vinyl siding, restoring its original appearance. |
| Cracked Vinyl Corner | A deeper crack in a vinyl corner trim piece. | A more extensive vinyl patching kit was employed. The damaged section was thoroughly cleaned and prepared. The repair compound was meticulously applied, carefully filling the crack. After the compound had cured, the repaired area was sanded and painted to match the original vinyl. | The crack was filled, and the corner was restored to its original strength and appearance. |
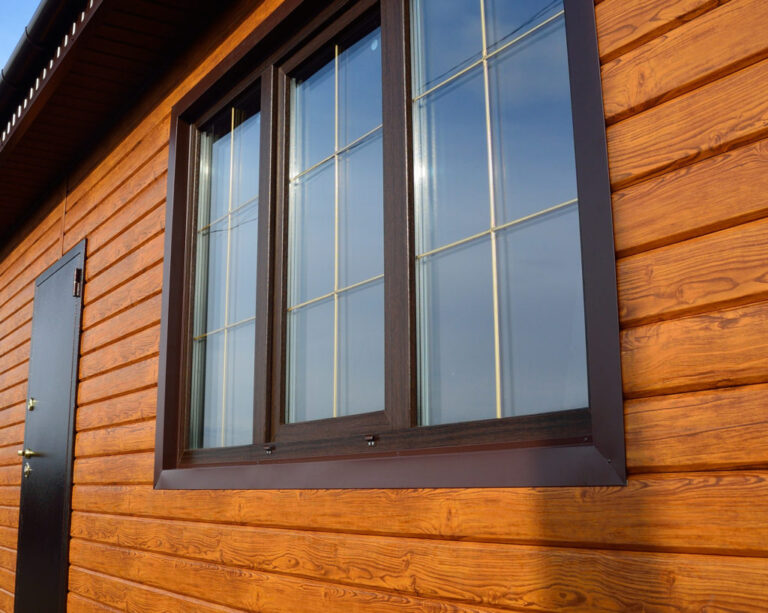
Rotten Wood Trim Piece
Wood siding trim, while attractive, is susceptible to rot and decay over time. Early detection and prompt repair are crucial to prevent further damage.
| Scenario | Damage Type | Repair Method | Outcome |
|---|---|---|---|
| Minor Rot | Small areas of soft, decaying wood on a trim board. | The affected portion of the wood trim was carefully removed. The underlying structure was inspected to ensure its integrity. A new piece of matching wood trim was cut to size and installed using appropriate wood glue and screws. | The damaged area was effectively removed and replaced, preventing further rot and preserving the trim’s structural integrity. |
| Significant Rot | Extensive rot and decay throughout a wood trim board, compromising its structural integrity. | The entire damaged wood trim board was removed. A new, larger board was cut to size and installed, using appropriate wood glue, nails, or screws. The entire area was then caulked and painted to match the surrounding siding. | The entire trim board was replaced, effectively addressing the root cause of the rot. The repaired area matched the surrounding siding and enhanced the property’s overall appearance. |
Cost Considerations
Siding trim repair, like any home improvement project, involves careful consideration of costs. Understanding the factors influencing the price tag allows homeowners to budget effectively and make informed decisions. Accurately assessing the scope of work and potential materials is essential for a successful and financially sound repair.
Estimating the total cost involves several key elements: labor, materials, and potential additional expenses. The specific repair method chosen and the complexity of the damage significantly affect the overall cost. Accurate cost estimates are vital to planning a project effectively and avoiding unforeseen financial burdens.
Average Costs for Siding Trim Repair
Average costs for siding trim repair vary significantly based on several factors. Labor rates vary by region and the complexity of the job. Material costs depend on the type of siding and trim used. A crucial element in determining the overall cost is the extent of the damage.
Comparison of Repair Methods and Materials
Different repair methods impact the overall cost. For minor damage, patching or caulking might be sufficient, keeping costs relatively low. However, for extensive damage, replacement of entire sections might be necessary, increasing the overall cost. Furthermore, the type of siding material influences the cost of repair. Vinyl siding, for example, often involves more straightforward and affordable repairs than wood siding.
Estimated Costs for Various Scenarios
To illustrate the range of costs, consider these examples:
| Scenario | Estimated Cost | Materials | Labor |
|---|---|---|---|
| Repairing a small crack in vinyl siding trim (caulking and patching) | $150-$350 | $20-$50 (caulk, filler) | $100-$300 (labor) |
| Replacing a damaged section of cedar siding trim (wood) | $500-$1500 | $150-$400 (wood trim, fasteners) | $350-$1100 (labor) |
| Repairing multiple damaged sections of vinyl siding trim, including new trim installation | $800-$2000 | $200-$500 (vinyl trim, fasteners, caulk) | $600-$1500 (labor) |
These are estimates, and actual costs may vary depending on specific circumstances.
Factors Influencing the Total Cost of Repair
Several factors can influence the total cost of repair:
- Extent of damage: A minor crack will cost less than replacing a large section of damaged trim.
- Type of siding: Wood siding repairs often cost more than vinyl siding repairs due to the materials and labor required.
- Complexity of the repair: Replacing a section of trim on a complicated architectural feature will cost more than replacing a straightforward section.
- Labor rates: Local labor rates in a particular region play a significant role in determining the cost of the repair.
- Materials availability: If specific materials are in short supply or are specialty items, this can increase the overall cost.
Accurate cost estimations are essential to ensure that the repair budget is realistic and aligned with the anticipated outcome.
Summary: Siding Trim Repair
In conclusion, this guide has provided a comprehensive overview of siding trim repair. By understanding the different materials, common damage types, and effective repair methods, homeowners can proactively maintain their siding trim and prevent costly problems. Remember, addressing minor issues promptly is key to preserving the structural integrity and aesthetic appeal of your home’s exterior. From identifying damage to selecting the right repair techniques, we’ve explored all facets of siding trim upkeep. The provided tables offer valuable insights into material lifespans, repair methods, and cost considerations. By implementing the preventative measures discussed, you can significantly extend the life of your siding trim and maintain the overall value of your property.